

Welcome to the Ultimate Guide to Managing Your Assets Directory! If you're looking to organize, upload, or manage your assets like images, videos, documents, and more, you've come to the right place. Whether you’re a beginner or someone with experience, this guide will help you navigate the Assets Directory with ease.
We’ll break everything down into simple, clear steps with examples, so you can start managing your assets without needing outside help.
Who Can Benefit from This Guide?
This guide is perfect for project managers, team members, designers, or anyone responsible for handling assets in a project. Whether you're managing files for presentations, product launches, or educational content, you will find useful tips and easy-to-follow instructions that will help you manage everything on your own, without needing to contact customer support.
What Will You Achieve by the End?
By following this guide, you will be able to:
-
Understand how to organize your project assets effectively.
-
Learn how to upload files and folders and organize them into easily navigable directories.
-
Gain the confidence to use filters and sorting tools to find assets quickly.
-
Master advanced features like importing assets from other projects, renaming files, and moving them around.
-
Access your assets without any technical difficulties, all while staying self-sufficient.
This guide is your one-stop resource for managing your assets, no need for external help. Let’s dive into the main details!
1. What Are Assets and Why Are They Important?
What Are Assets?
In the context of your project, assets refer to any external files or materials that are used to enrich your project. These could include:
-
Images: Graphics, logos, or any type of visual content used in your project.
-
Videos: Any recorded videos that are part of your content.
-
Documents: PDFs, text files, spreadsheets, and more.
-
Other Files: Audio files, presentations, and data files.
These files are essential to your project because they bring content to life, whether it’s adding visuals to a presentation, integrating sound into a video, or sharing documents with team members. Organizing and managing these files correctly is crucial for smooth project execution and efficiency.
Why Are Assets Important?
Assets form the backbone of your project. Without them, you have little to work with. Proper asset management ensures that you can access and use the right content at the right time. Having a well-organized Assets Directory makes collaboration smoother, helps prevent errors, and ensures that your work stays on track.
2. Getting Started with the Assets Directory
Now that we know what assets are, let’s look at how to get started using the Assets Directory.
How to Access the Assets Directory
When you start working on a project, you’ll be able to access the Assets Directory from within your project’s dashboard. Look for a section called Assets or something similar. Once you click on it, you’ll be taken to the area where all your assets are stored and managed.
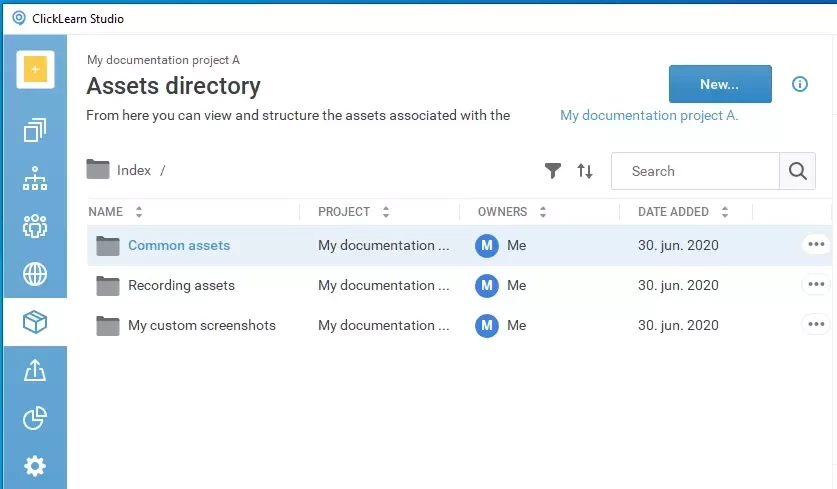
The Layout of the Assets Directory
Once you’re in the Assets Directory, you’ll see a list of folders and files. Here’s a quick overview of what you’ll find:
-
Folders: These are like file cabinets where you keep your files organized. You can create as many folders as you need.
-
Files: These are the actual assets images, videos, and documents that you upload and organize into folders.
Example:
Imagine you’re working on a presentation for a product launch. You might have the following folders:
-
Images (for product photos)
-
Documents (for your marketing plan or scripts)
-
Videos (for promotional clips)
-
Audio (for voice-over files)
By using these folders, you’ll keep your assets neatly separated and easy to find.
3. Uploading Your First Asset
Once you're familiar with the layout, let’s walk through how to upload an asset into your project.
Step 1: Upload a File
To upload a file (say, an image or a document), follow these steps:
-
Click on the New button at the top of the screen.
-
Select Upload File.
-
A pop-up will appear. Click Browse or Select Files and choose the file you want to upload from your computer.
-
Once selected, you can choose where you want to place the file—either in a common folder or a specific project folder.
Example:
You want to upload a product image to the Images folder. Choose your file (say, a .jpg image), select the Images folder, and confirm the upload. Now, that image is part of your project.
Step 2: Upload a Folder
If you have many files to upload at once, it’s faster to upload a folder. Here’s how:
-
Click on the New button again.
-
Select Upload Folder.
-
Choose the folder you want to upload from your computer. The folder and all its contents will be uploaded automatically.
Example:
Let’s say you have a folder named Product Photos with 10 images inside it. Instead of uploading each image individually, you can upload the entire folder at once to save time.
4. Organizing Your Assets
How to Create New Folders
To keep your assets organized, you can create new folders. Here’s how:
-
Click the New button at the top.
-
Select New Folder.
-
Name your folder (e.g., Videos, Documents, Audio Clips).
-
Click Create.
Example:
You’re working on a video project and you have multiple video clips. Create a folder called Video Clips and put all your clips in that folder. It’s a simple way to keep things neat and accessible.
Moving Files and Folders
If you want to reorganize your files, you can easily move them. Here’s how:
-
Select the file or folder you want to move.
-
Click the More button (three dots) next to the asset.
-
Select Move and choose the new location.
Example:
Let’s say you accidentally uploaded a document to the Images folder. You can select the document, click Move, and move it to the Documents folder.
5. Renaming and Deleting Assets
Over time, you may need to rename or delete assets. Here’s how to do both:
Renaming Assets
-
Click the More button (three dots) next to the asset.
-
Select Rename.
-
Type the new name for the asset and hit Enter.
Example:
You uploaded a file named product_image_v1.jpg, but you want to rename it to product_image_final.jpg for clarity. Simply click Rename and update the name.
Deleting Assets
If you no longer need a file or folder, you can delete it:
-
Click the More button next to the asset.
-
Select Delete.
-
Confirm that you want to delete the asset.
Important Note:
Once deleted, assets cannot be recovered. Be sure you really want to remove it before confirming.
6. Importing Assets from Other Projects
Sometimes you may need to bring in assets from other projects you’re working on. Here’s how:
-
Click the New button.
-
Select Import Assets.
-
A window will pop up, showing you a list of other projects.
-
Choose the project and select the assets you want to import.
7. Using Filters and Sorting for Easy Navigation
As your project grows, you might end up with a lot of assets. Don’t worry! You can filter and sort your assets to make navigation easier.
Sorting Your Assets
Click on the column headers (like Name, Date Added, or Size) to sort your assets. You can sort by:
-
Name: Alphabetically sorts your files.
-
Date Added: Shows the newest assets first.
-
Size: Sorts by file size.
Filtering Your Assets
If you have a large number of assets, use the Filter option to narrow down your results. You can filter by:
-
File Type (images, videos, documents, etc.)
-
Size
-
Date Added
8. Previewing and Downloading Assets
Before you use or download an asset, you may want to preview it.
Previewing an Asset
To preview an asset (like an image or video), simply click on it. A preview window will open so you can check it out before using it in your project.
Downloading an Asset
If you want to download an asset to your local device:
-
Click the More button next to the asset.
-
Select Download.
9. Troubleshooting Common Issues
Here are a few common issues and solutions:
Issue: My asset is not showing up.
-
Solution: Refresh the page or check the folder where you uploaded it. Sometimes, assets take a moment to appear.
Issue: I can’t upload a file.
-
Solution: Ensure the file size doesn’t exceed the limit and that it’s a supported file type.
10. Frequently Asked Questions (FAQs)
How can I recover a deleted asset?
Unfortunately, once an asset is deleted, it cannot be recovered. Always double-check before deleting anything.
Can I update assets after uploading them?
Yes! You can always upload a new version of an asset if you need to make changes.
What does “Use as Reference” mean?
When you choose "Use as Reference," you’re linking an asset from another project. Any changes made to the original file will be reflected in your project as well.