

Managing access to ClickLearn Attain by creating and deleting accounts, resetting passwords, and sending download links is one of the most common tasks that Admin users do.
In this article, we will be demonstrating how to:
- Add users one by one
- Add users to project groups
- Add users in bulk
- Sending ClickLearn Attain download links
- Resetting user passwords
- Disabling and deleting users
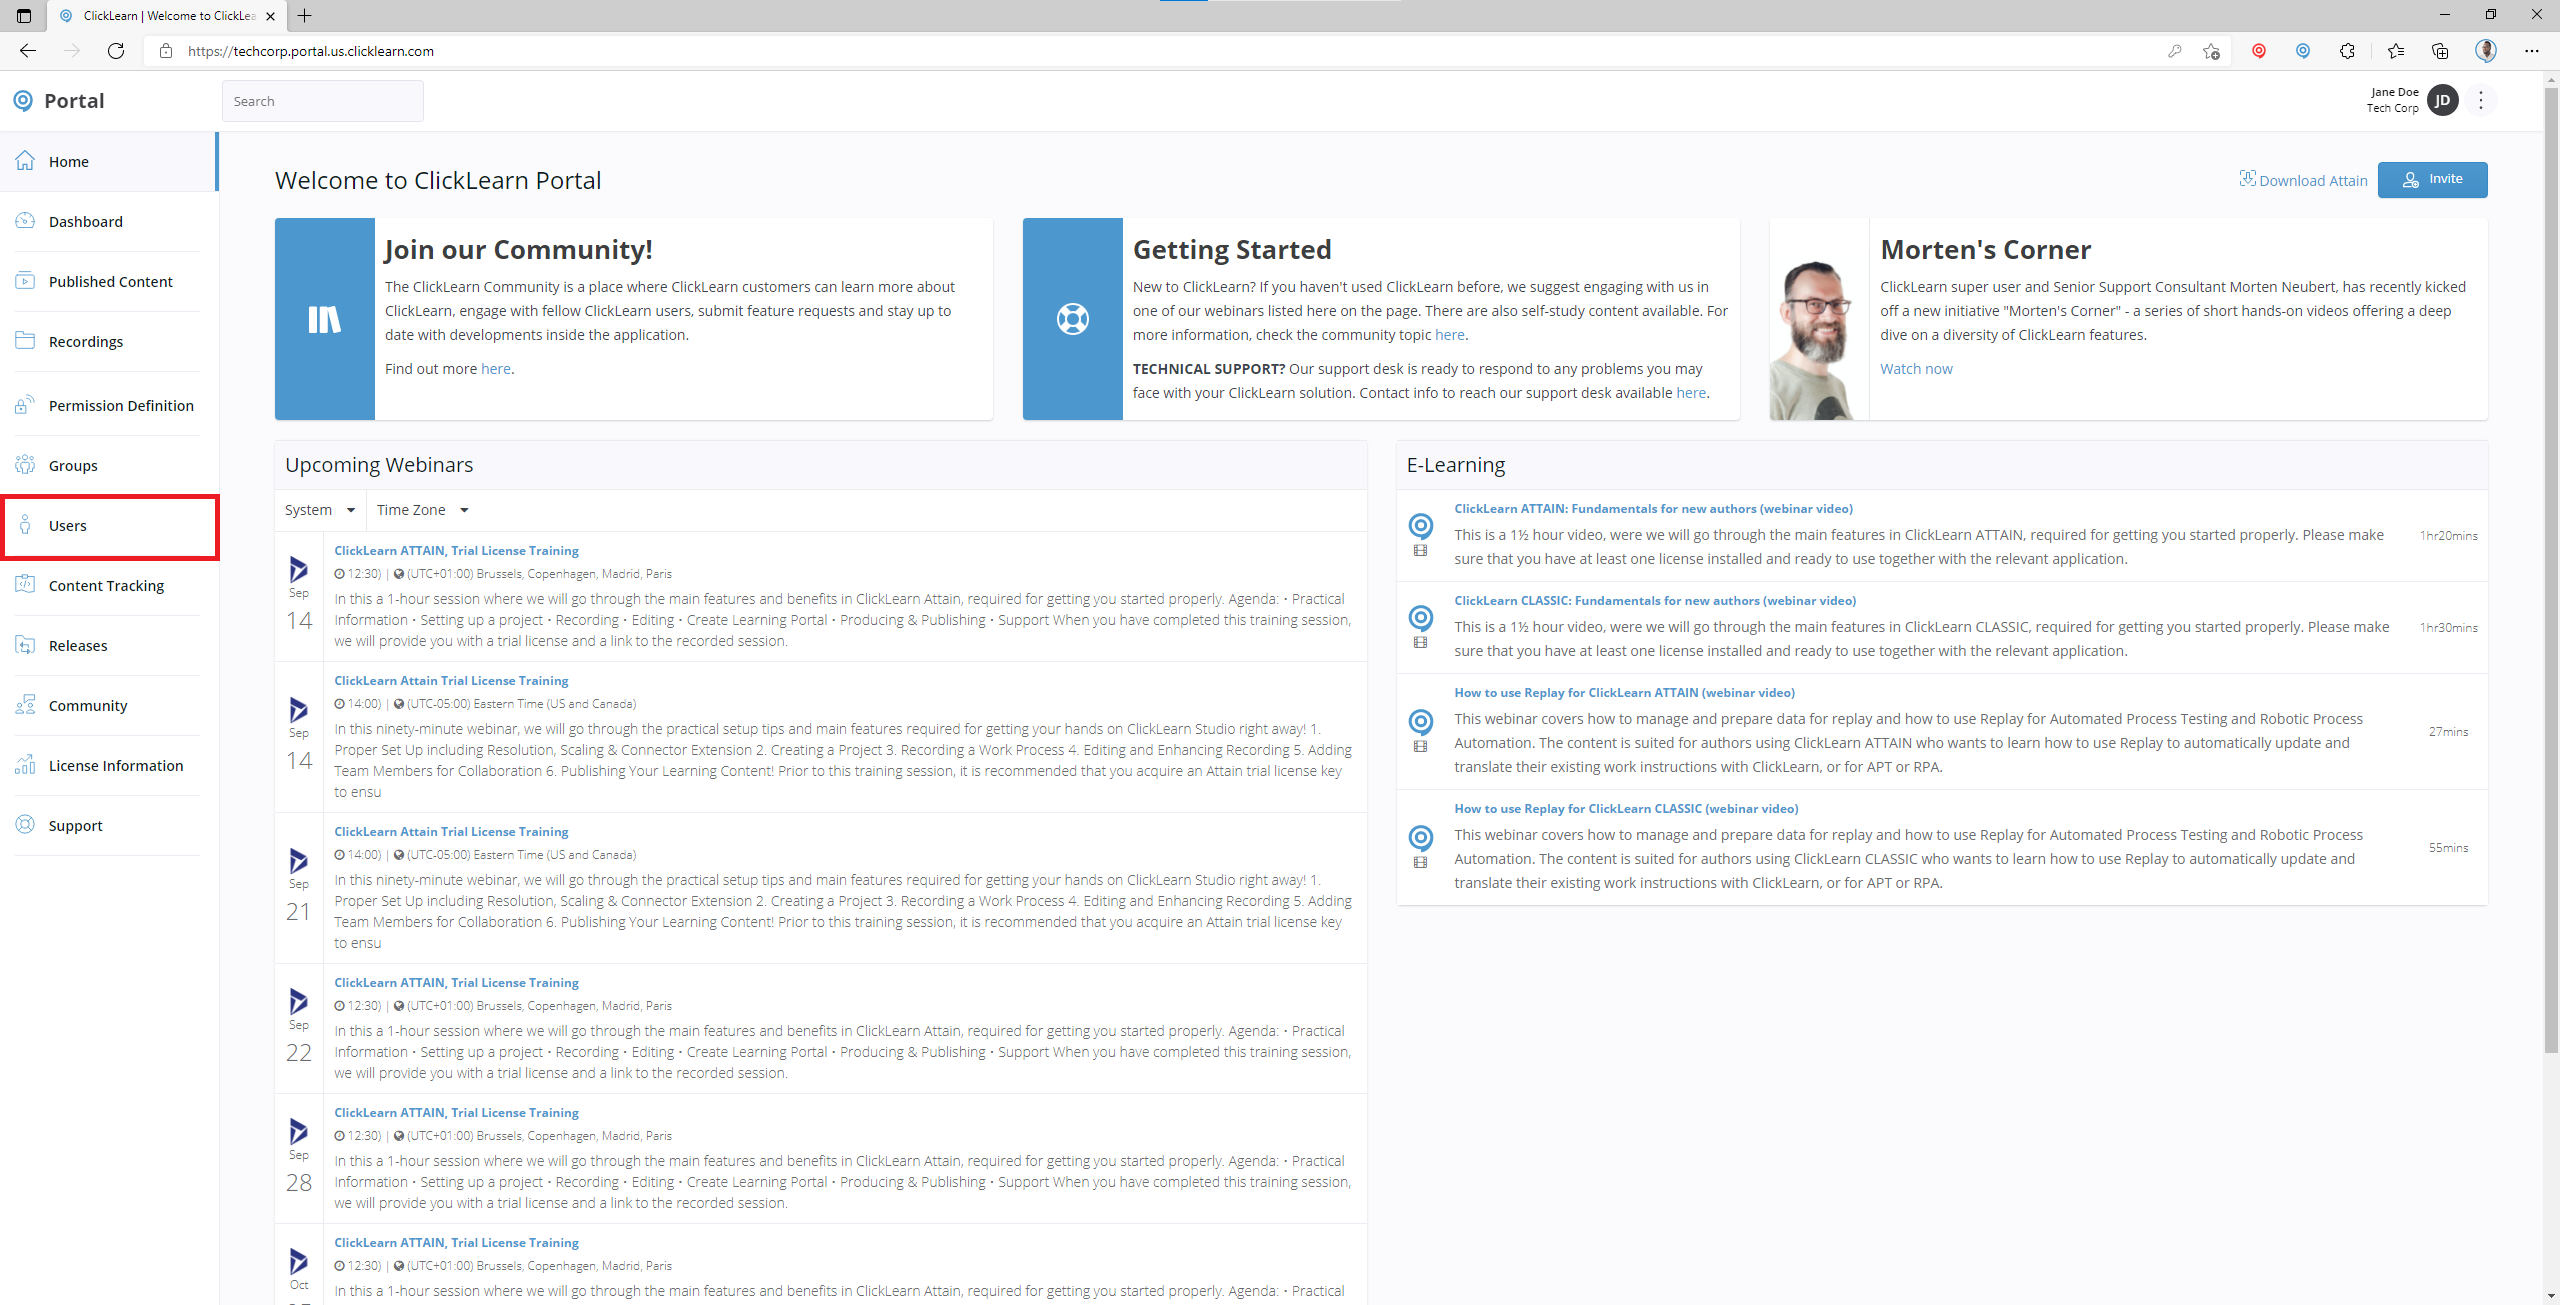
We are going to start from the Portal page that we have signed in to.
First, click Users.
This page displays all the current Authors that can access the ClickLearn Attain application to create content. To view end-users (Content Users) accounts, click on the Content User tab.
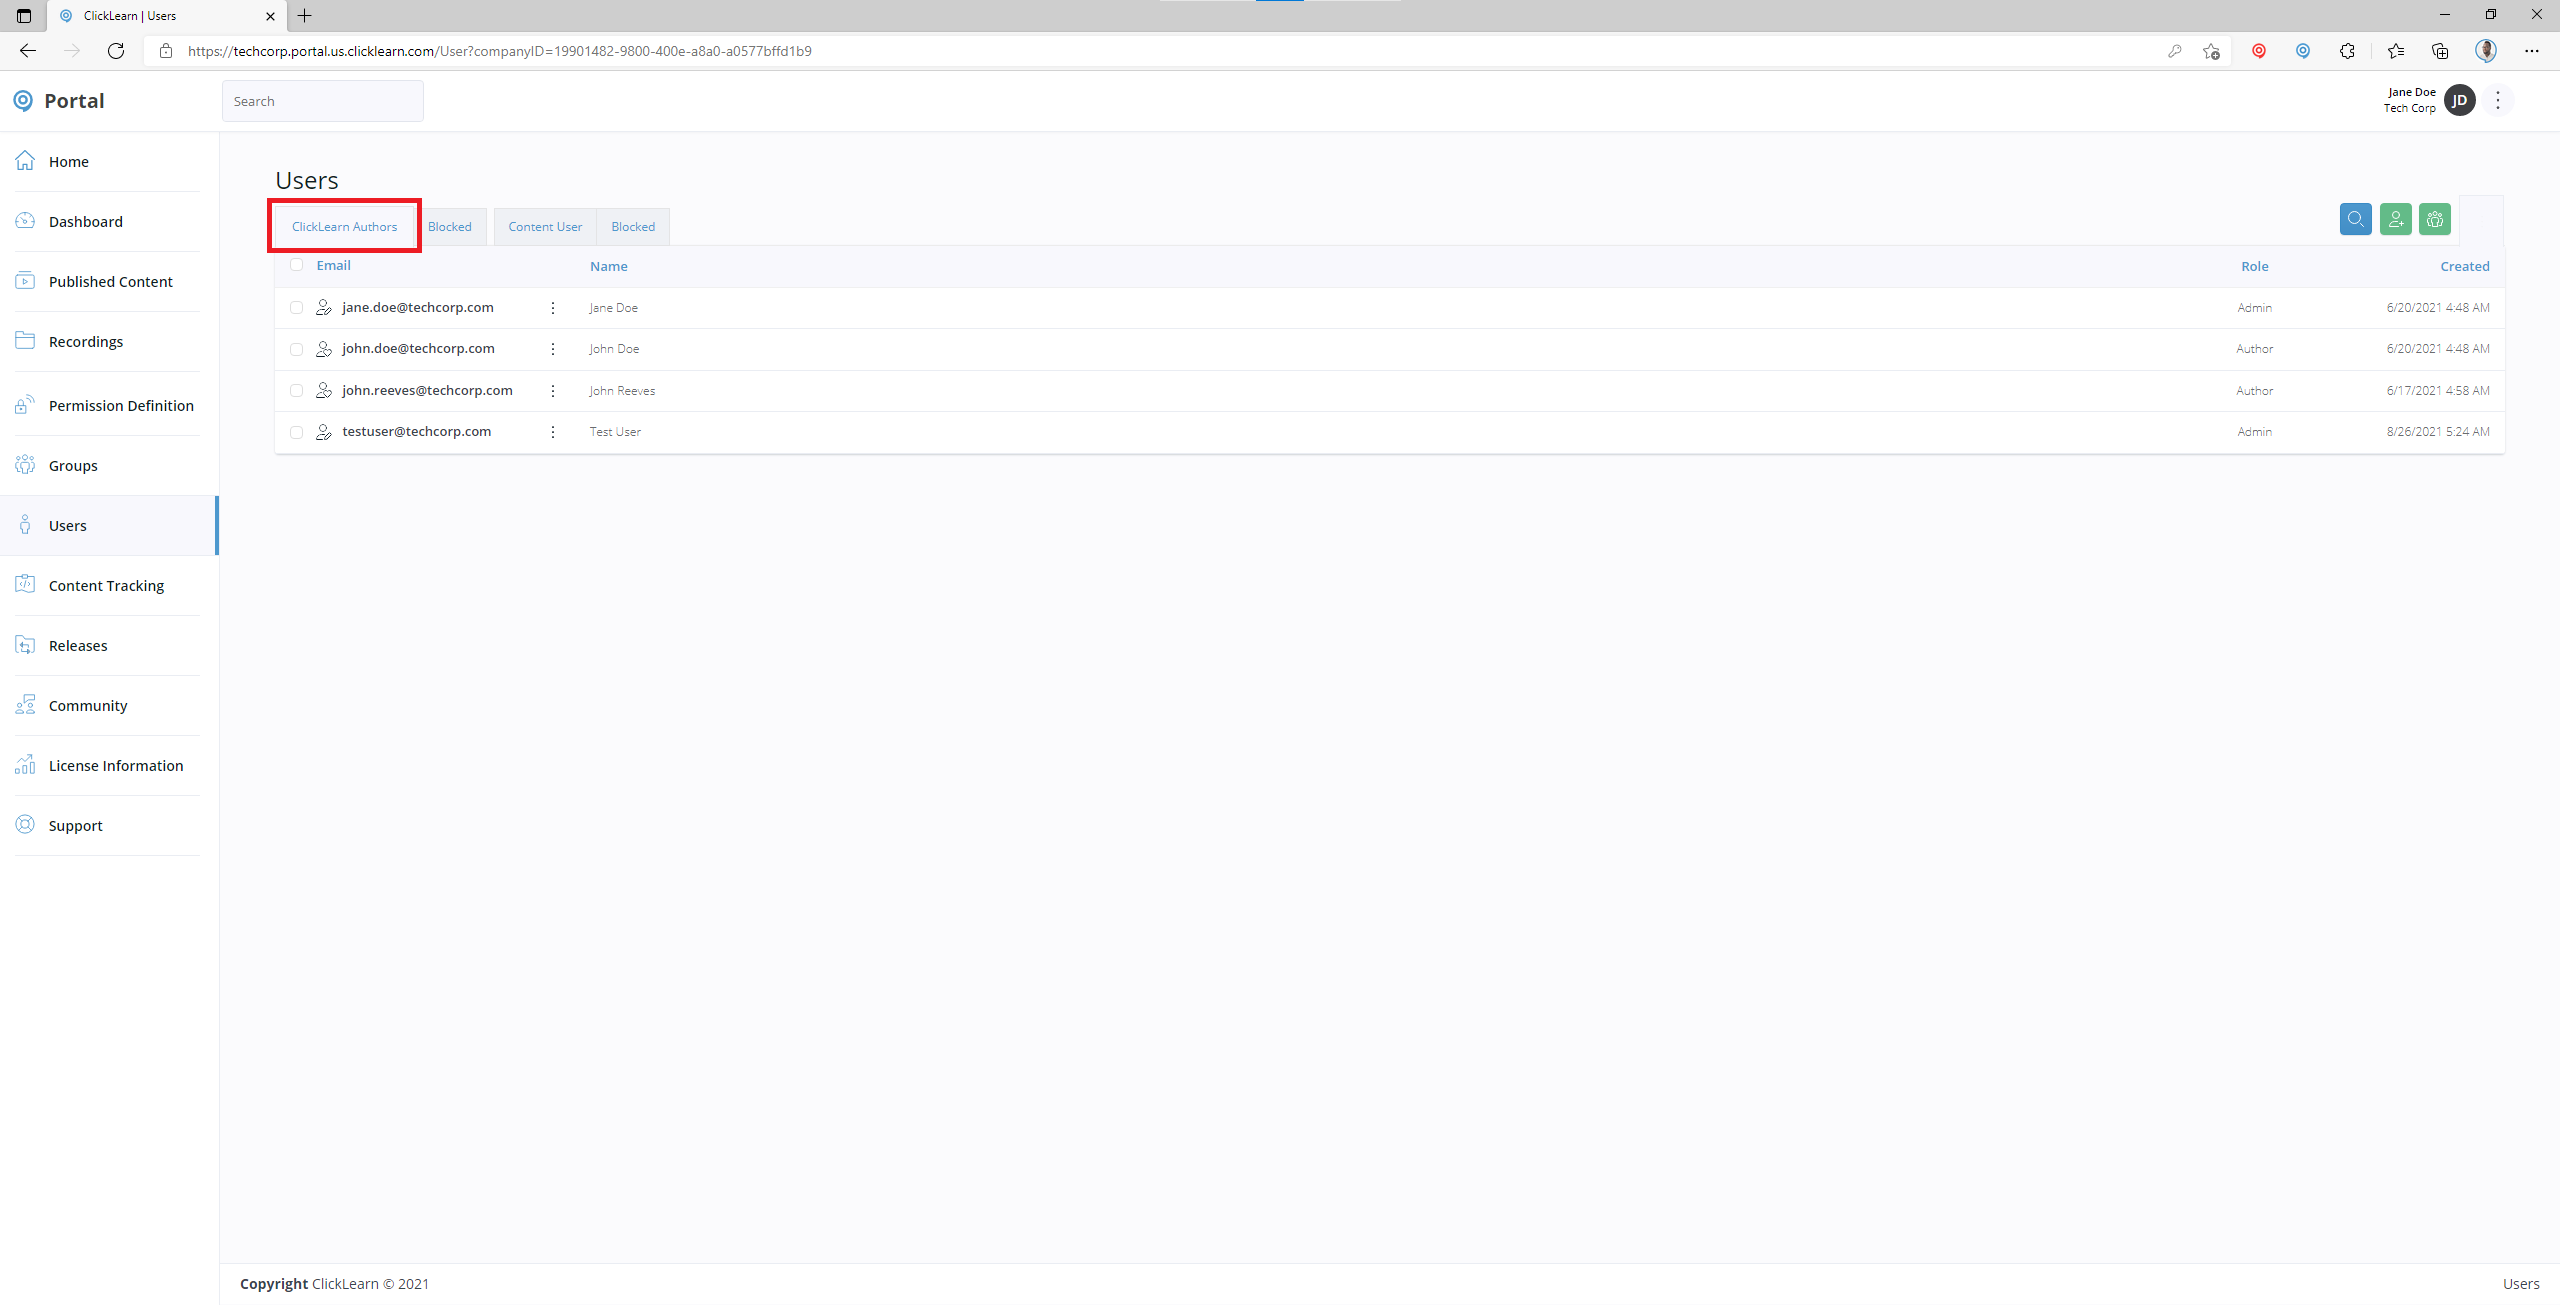
Please note that the Search, Add User, and Bulk Add User buttons will only work for the tab that you have selected. For example, if you wish to bulk add Content Users, you will first need to select the Content User tab before clicking the Bulk Add button.

Adding individual users
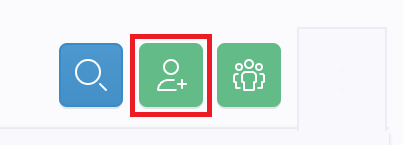
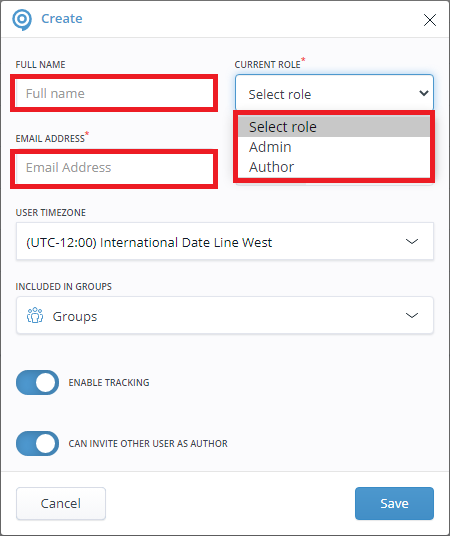
Click the Add button
Enter the new user's name, email address, and select the role. The two options available are Admin and Author. Admins and Authors have the same privileges, except Admins can manage (create, delete and reset passwords) users and permanently delete projects.
Remember, if you want to create a user whose only purpose is to view published content, you need to go to the previous screen and select Content User.
Adding users to project groups
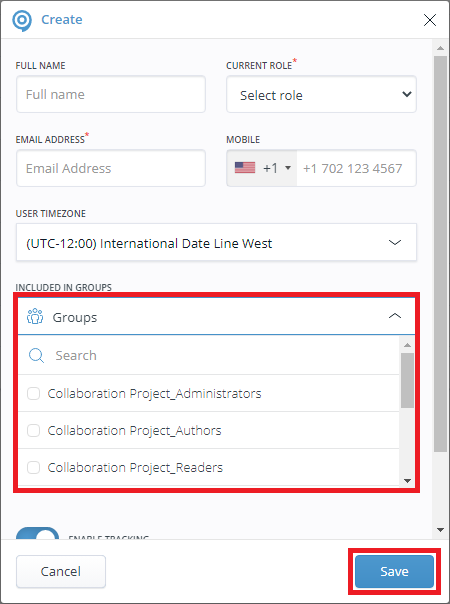
If you already know the names of existing projects that the new user will need to access, you can add them to groups at this stage. To do so, click the Groups dropdown and select one or more of the options that appear. Each group is categorized by the name of the project, followed by the access level. Eg. My First Project_Author
Click Save when you have finished completing the process of creating the user account. Note that you have not yet sent the new user their password (or license email with a download link) via email. We will cover this later in the article.
Adding users in bulk
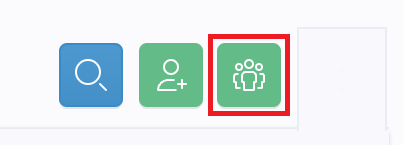
You can also Bulk add to save time if you have many users to add. To begin, click the Bulk Add User button. This is especially useful for managing Content Users.
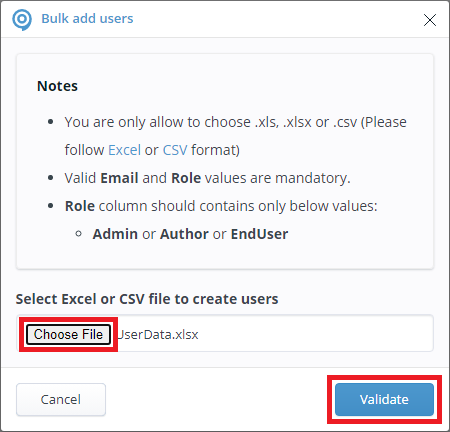
The popup will give you a basic outline of the data that you will need to provide.
You can click on Excel to download the Excel template.
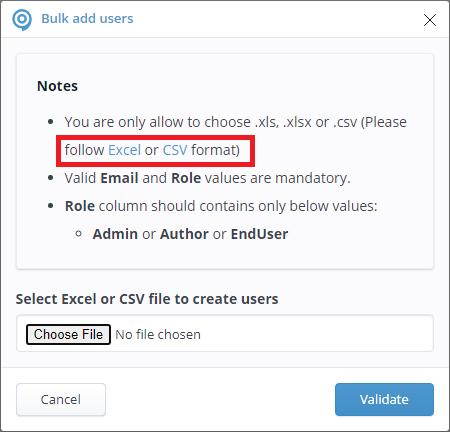
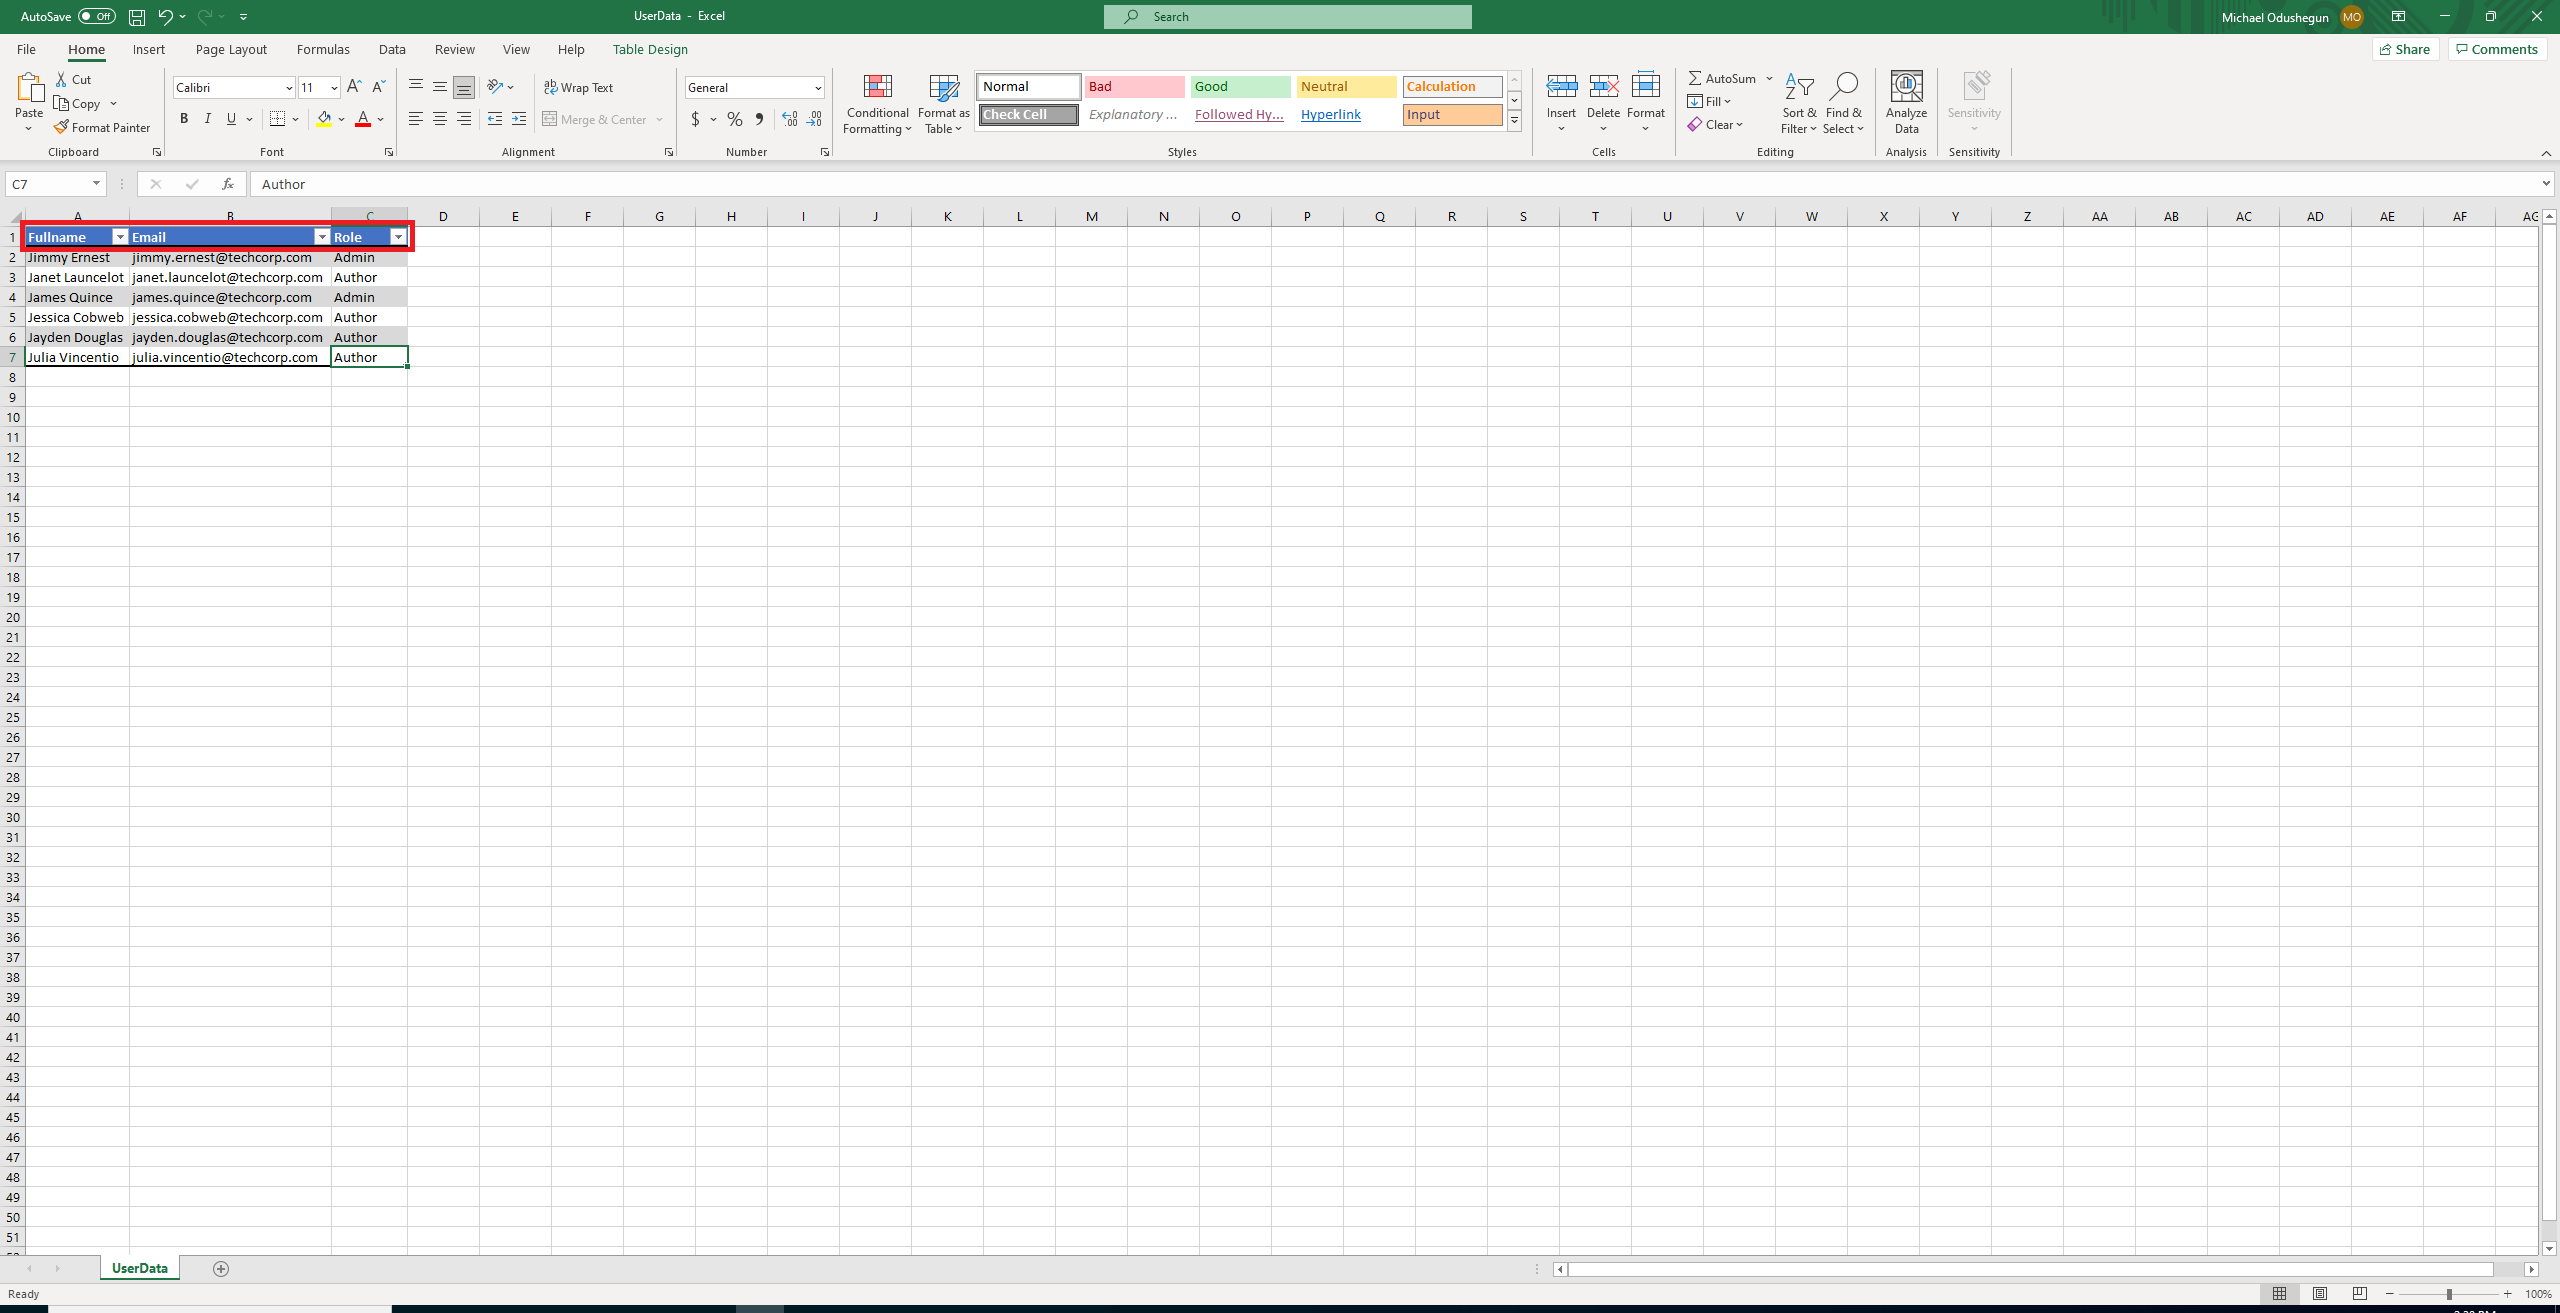
Open the Excel file and add the names, emails, and roles following the same layout provided in the spreadsheet. Once you have added your users, save and close the spreadsheet.
Go back to the ClickLearn Portal and open the Excel file by clicking Choose File, followed by Validate.
The Portal will display all valid accounts for you to review. It will also allow you to immediately send new passwords to every user account as part of the process. Tick "Send the new password to each user by email" and click Create.
This now completes the process of creating accounts.
Sending multiple Authors the download link
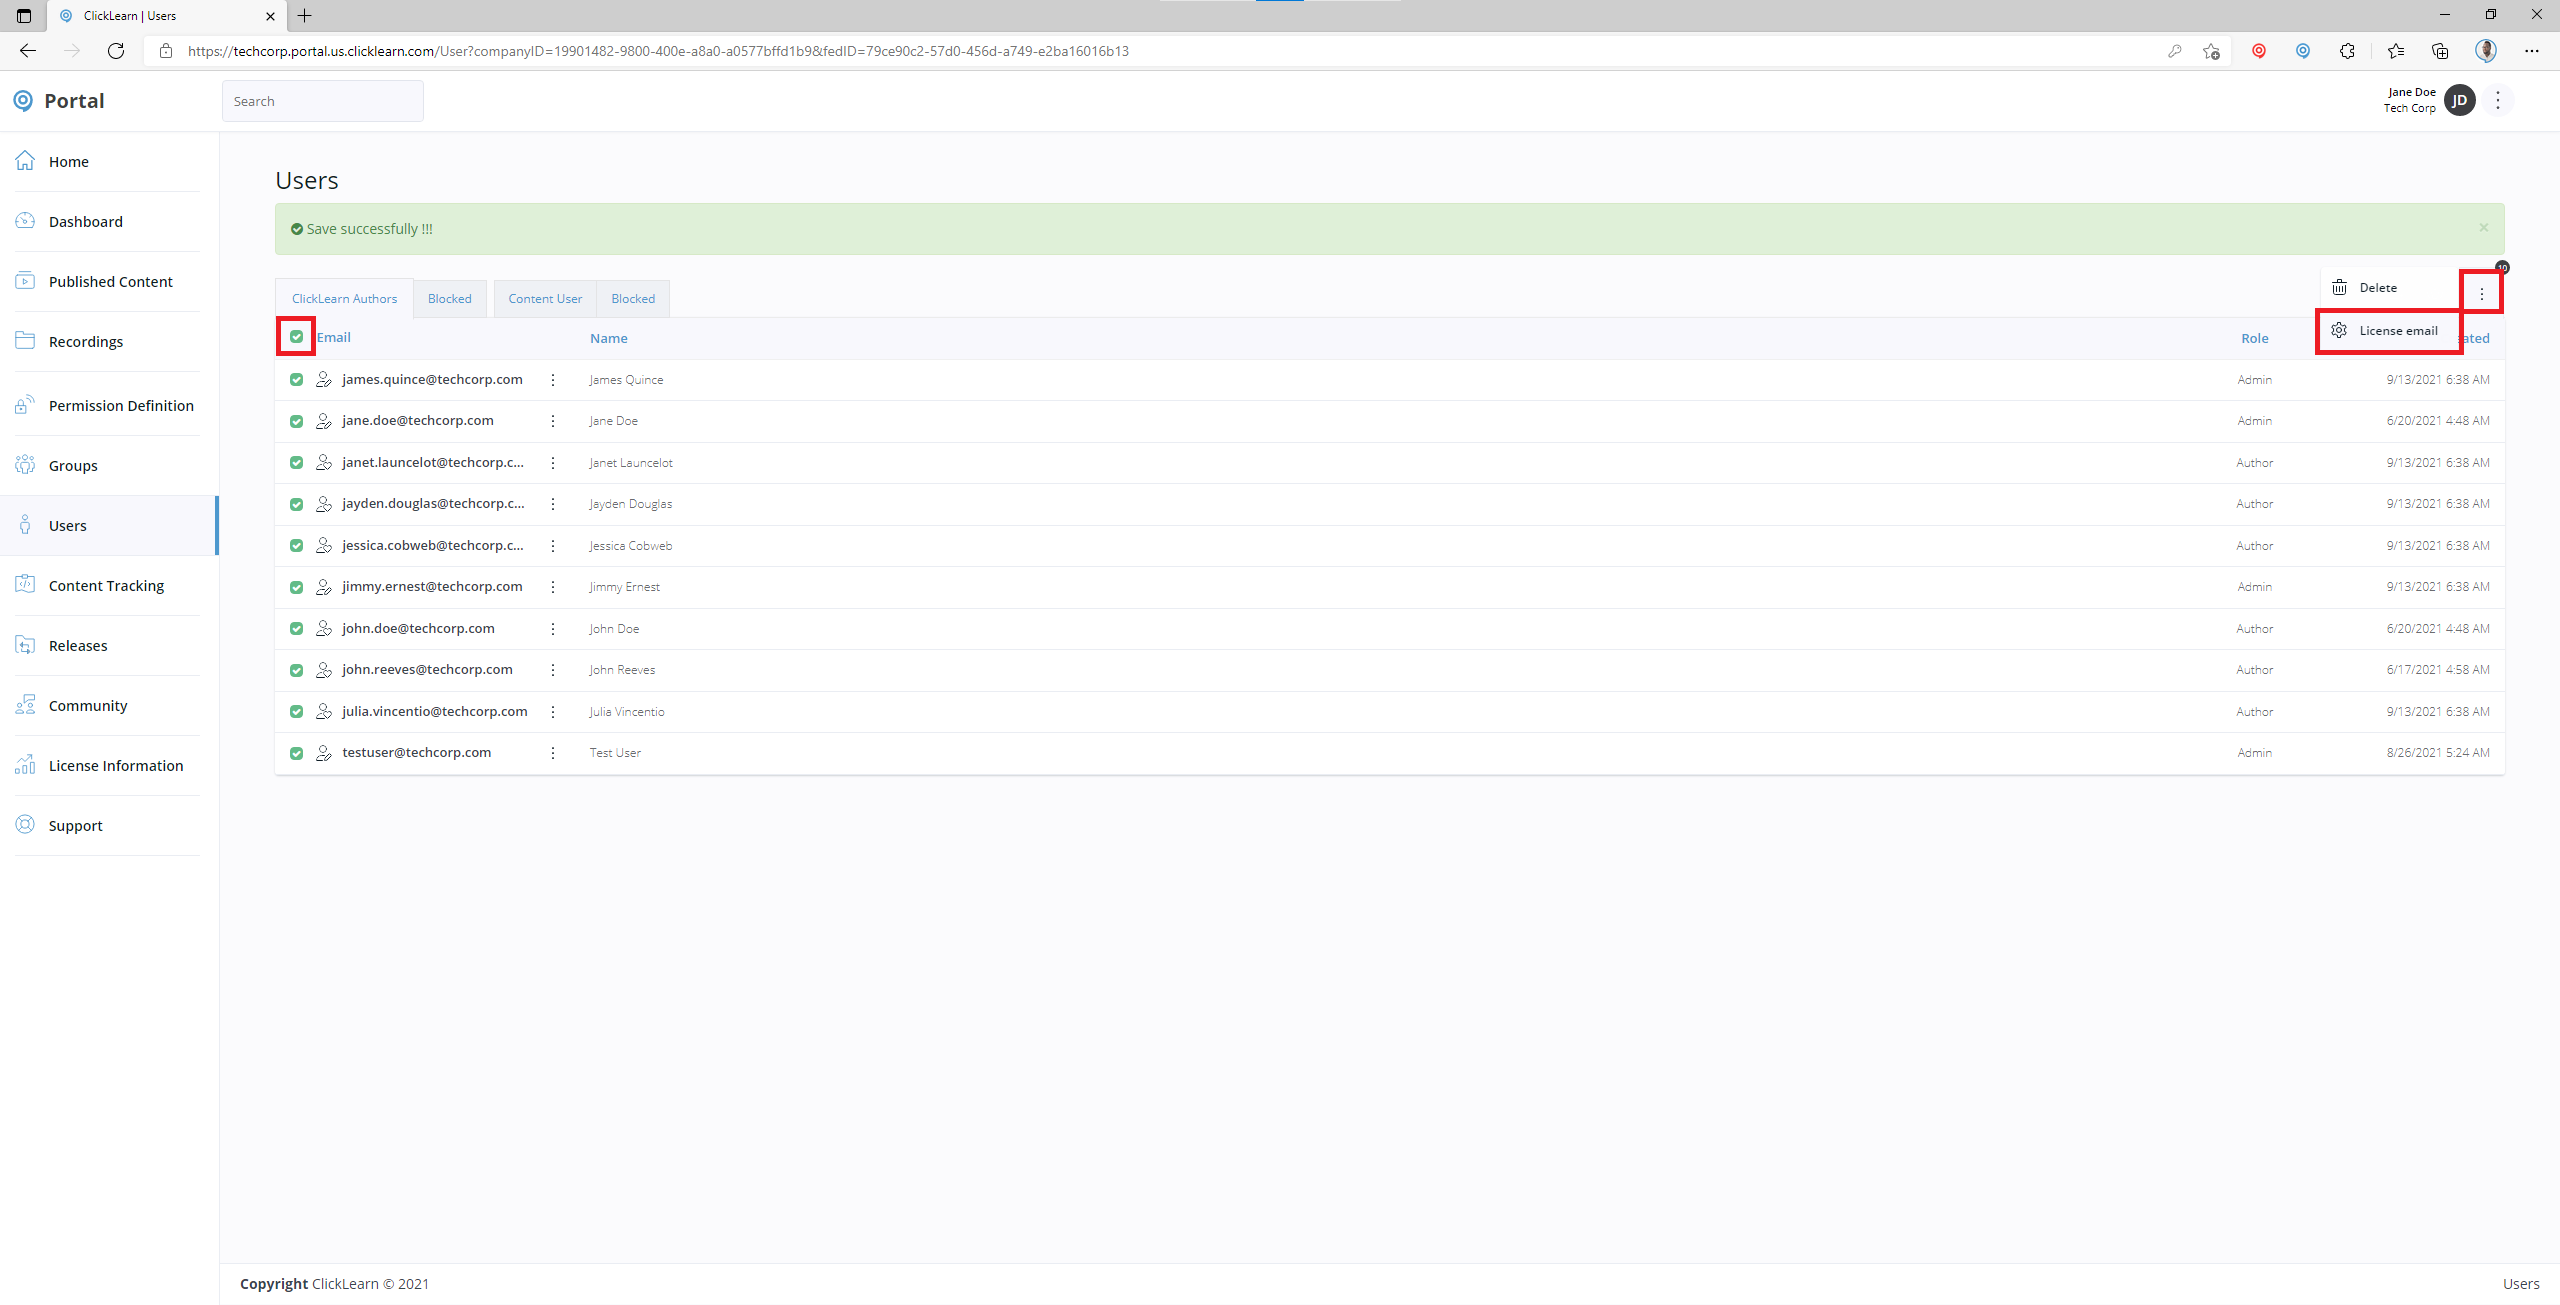
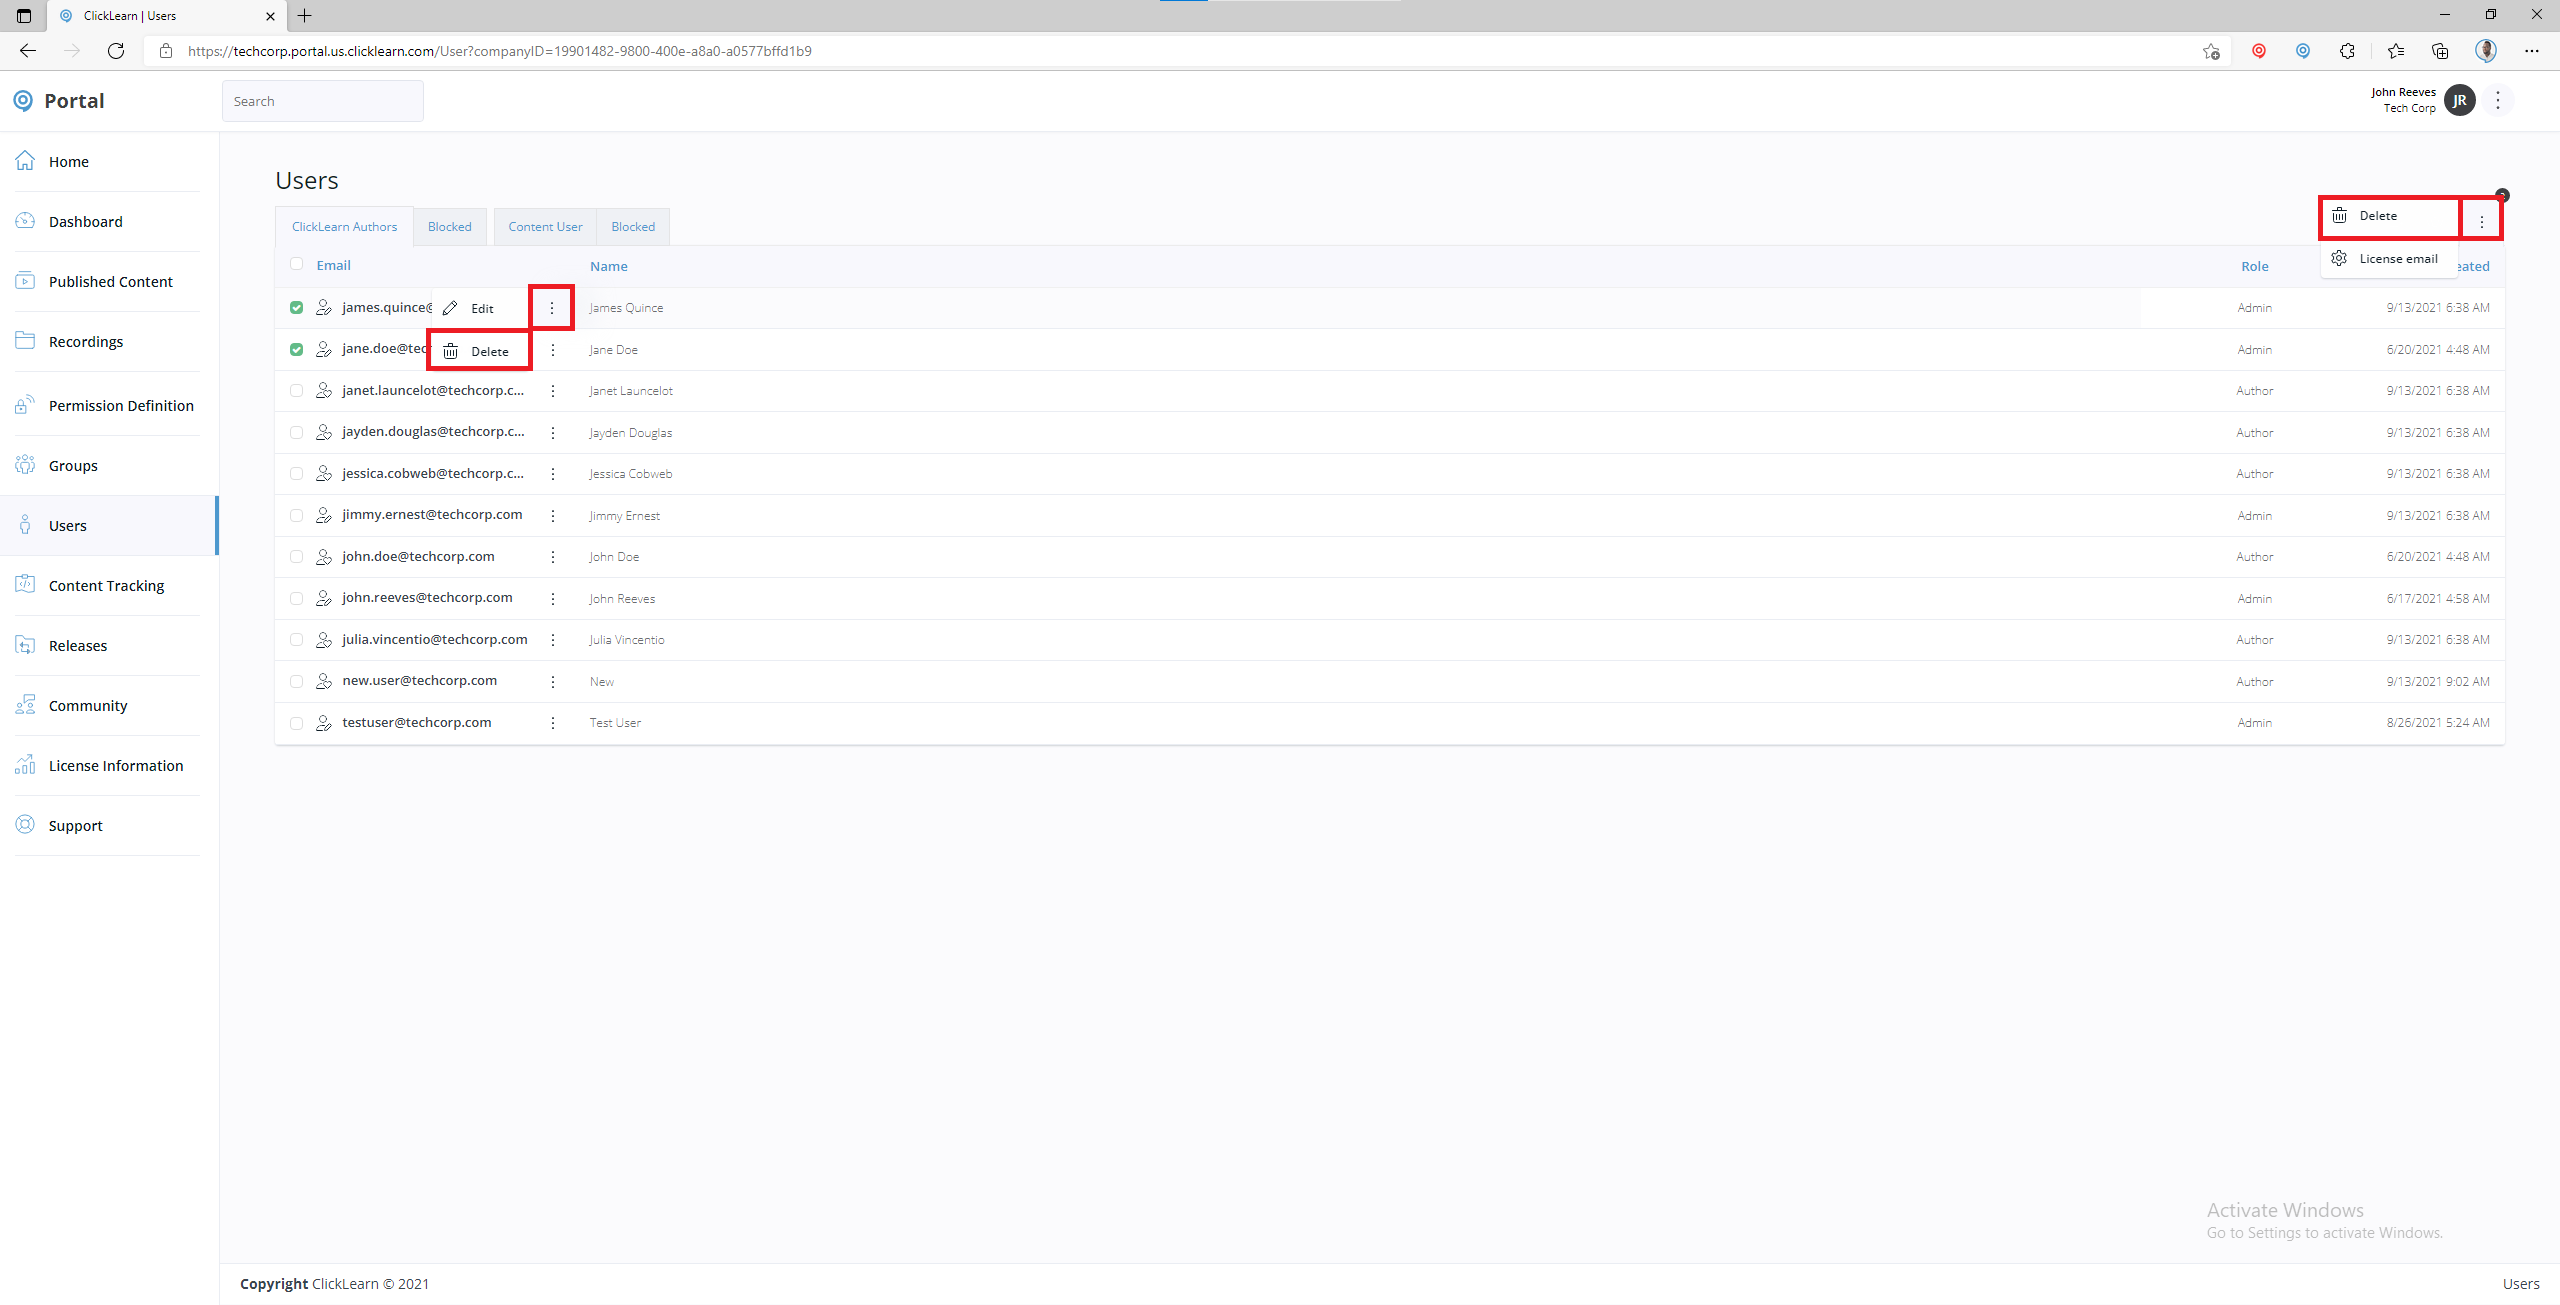
To send all users the download link to ClickLearn Attain, check all or specific users, and then click the vertical ellipsis, followed by the License email button.
Although this email contains the license information for your user and organization, it also contains the link needed to download Attain.
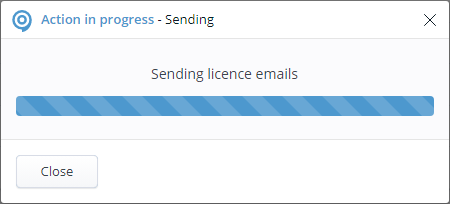
Please remember to wait until the process is completed before closing the box. Closing the box early will result in not all users receiving the email.
Resetting passwords and managing individual users
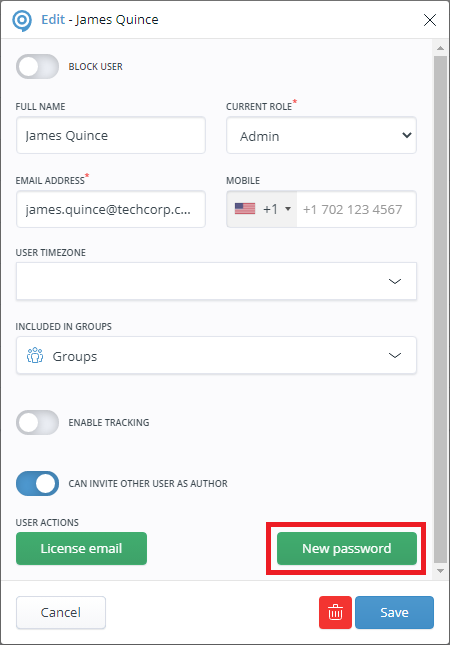
If you only need to make changes to one user, you can click on the ellipsis next to the user’s name and select Edit

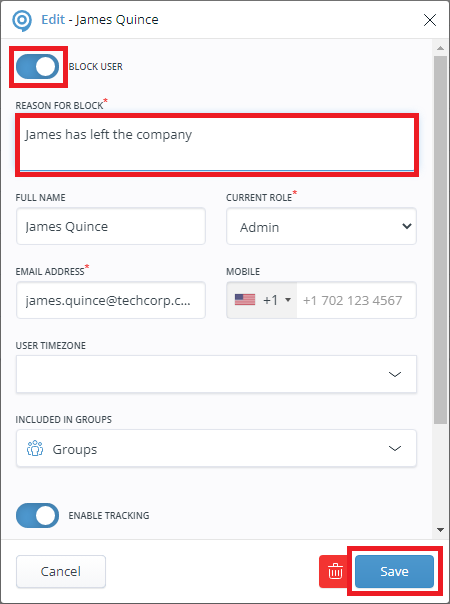
Unlike the section that we created a user in, this section allows you to make any changes to their name or email address. It also displays additional settings that will allow you to block users, change their role, enable and disable tracking for the user, and more. You can also send the download link and generate a new password via this section.
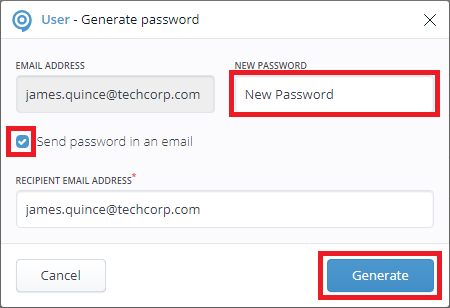
To generate a new password, click the New password button.
By default, it will generate a random password. However, administrators have the option of entering a password of their choosing. To do this, just enter your chosen password and then select Generate. Don’t forget to tick the Send Password in an email box if you want the author to receive it.
Deleting and disabling users
If a user leaves your organization or no longer requires access to a particular project, you can either delete or disable their account.
To delete a (or multiple users) simply select their accounts, click on one of the vertical ellipses and select Delete.
To block a user, click the ellipsis closest to their username and select Edit.
Toggle the Block option, enter a reason for blocking the user, and click Save. Blocked users will now appear in the corresponding Blocked tab.