

Before you start working on any project in ClickLearn Studio, it's important to understand how your team is organized. The Team section enables you to view, invite, manage, and control access for team members working on the same project.
Whether you are collaborating with authors or managing project settings, the Team workspace provides you with clear visibility and complete control.
What Is the Team Section?
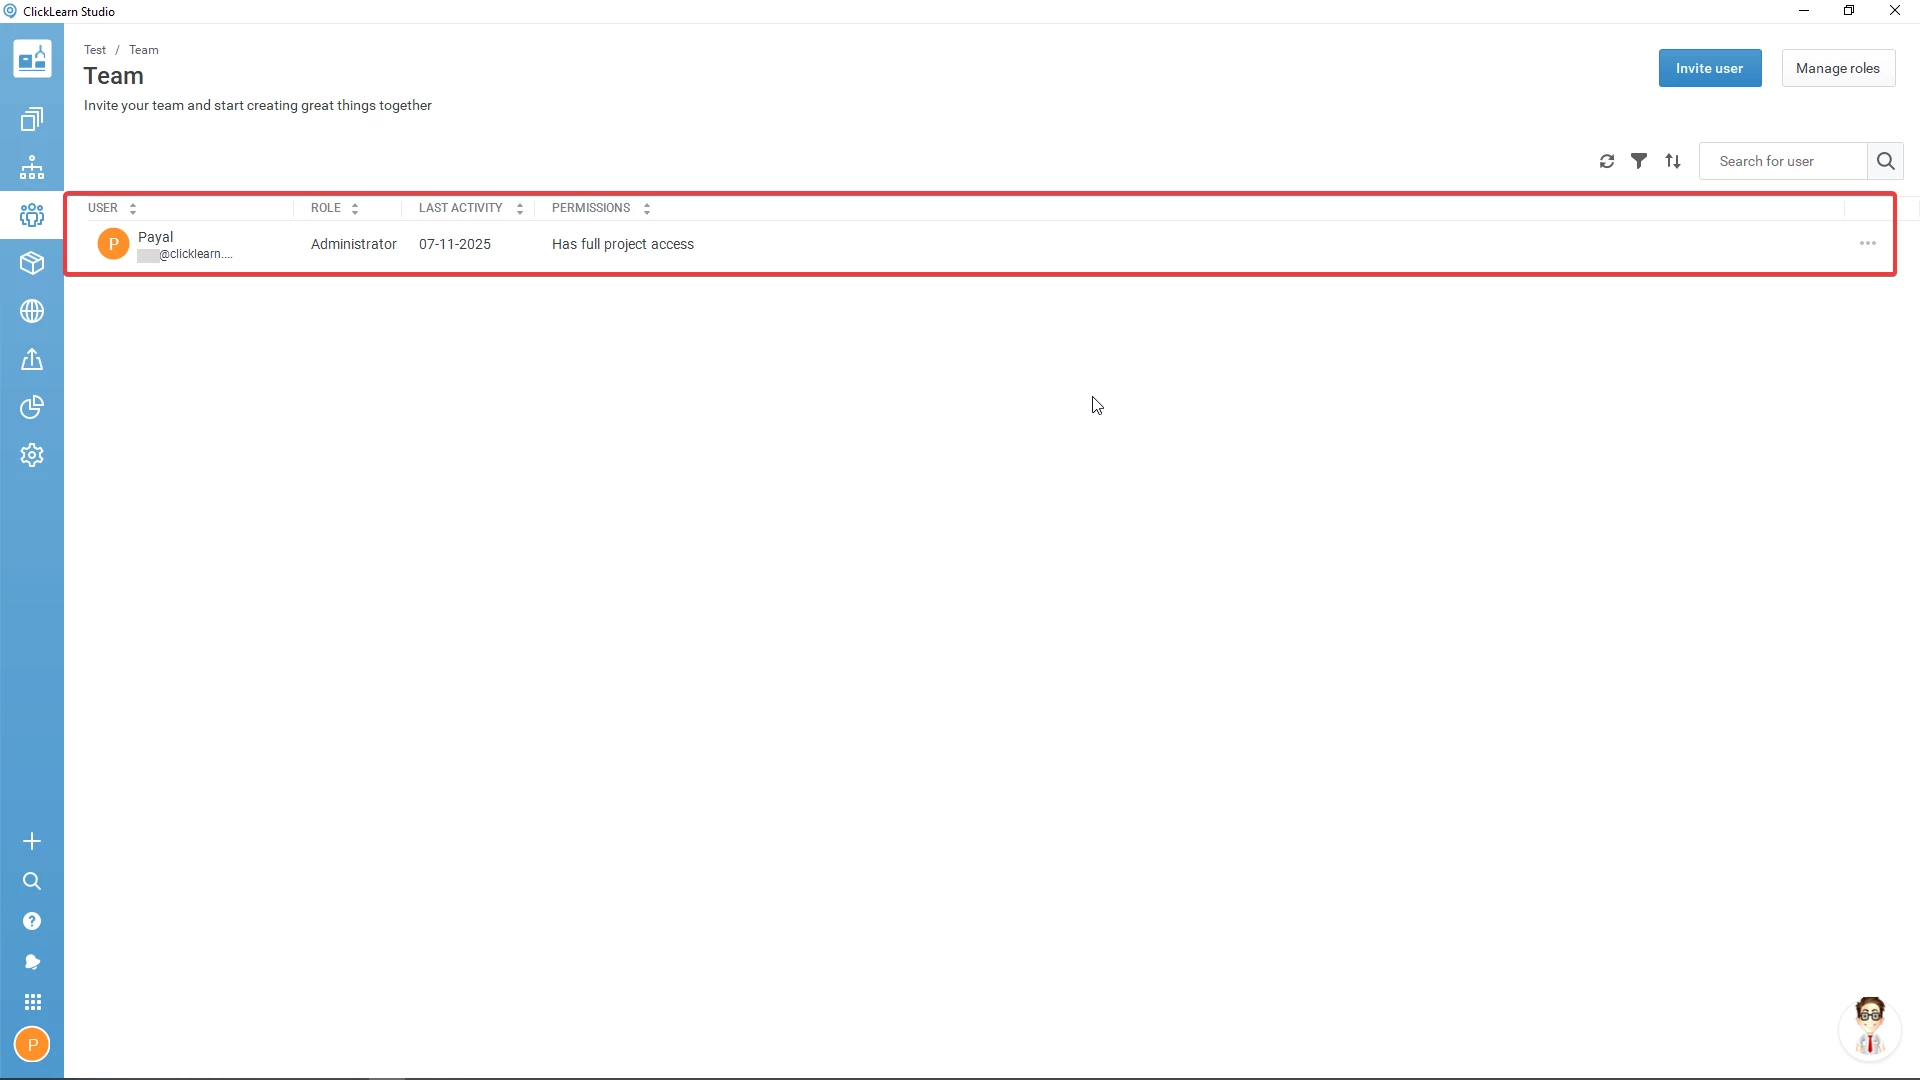
The Team section in ClickLearn Studio displays key details about the individuals involved in your project, including their name, role, permissions, status, and activities.
From here, you can:
-
Invite new members
-
Assign and manage roles
-
Remove access
-
Monitor usage and activity
To access it:
Open your project → Click Team
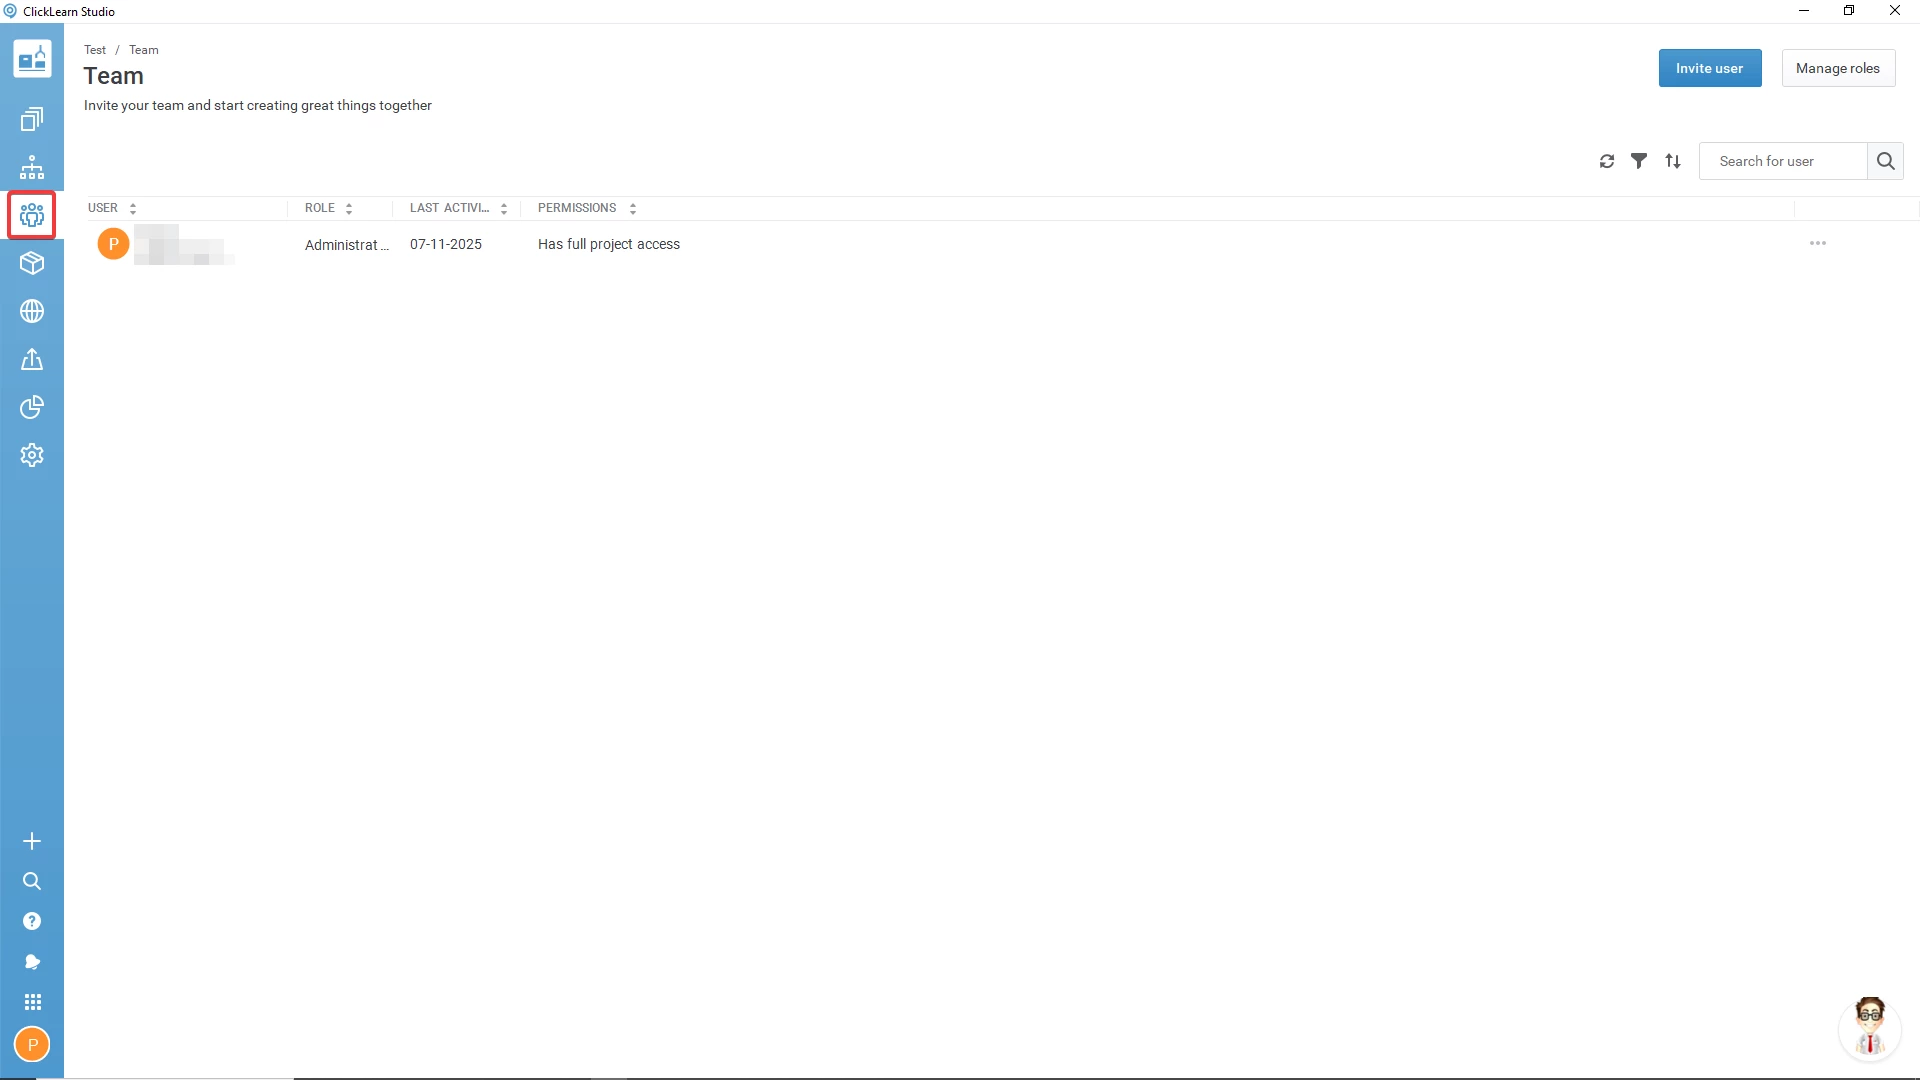
Basic Elements of the Team
Understanding these elements helps you manage your team efficiently.

1. User
Shows the list of all users associated with the project. Each entry typically includes the user's name, email address, profile details (where available), and their assigned role.
2. Roles
Displays whether each user is:
-
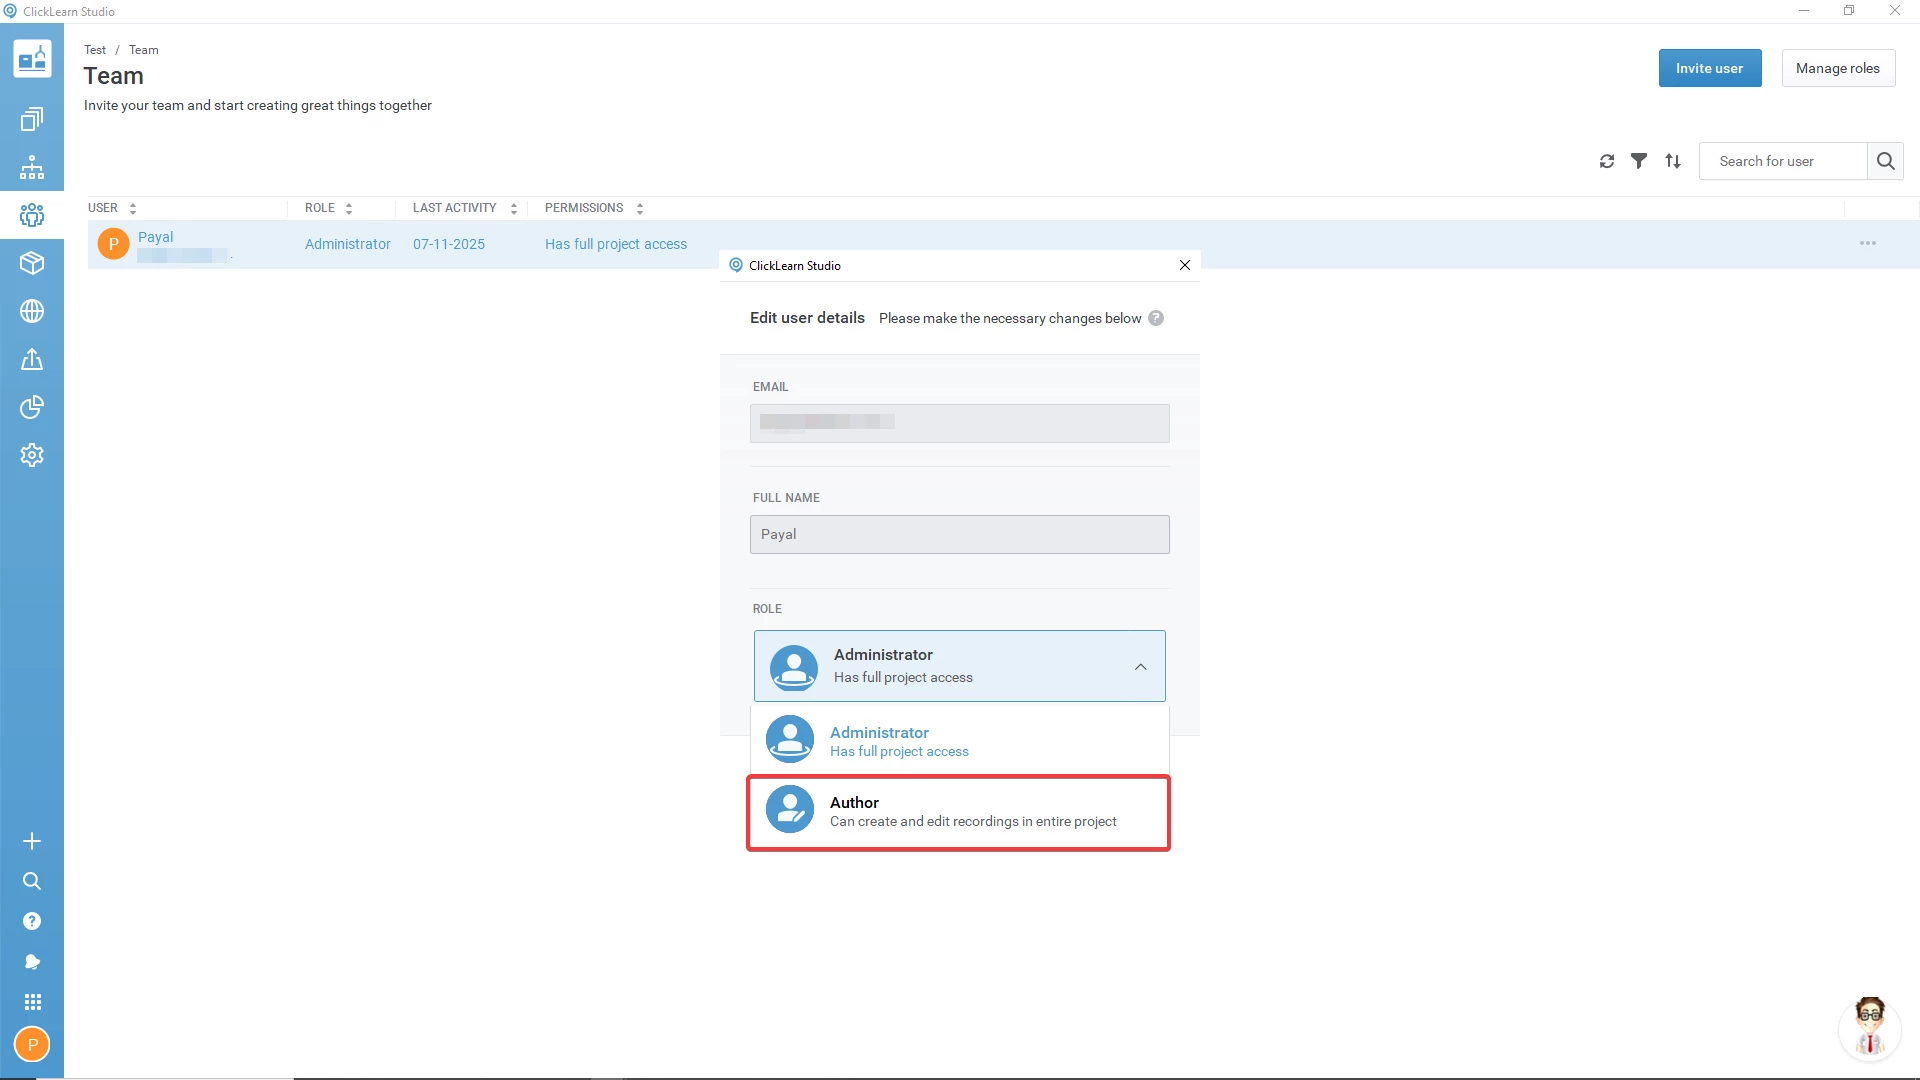
Administrator: Has complete access to all project settings, content, and user management options.
- Full access to the project
- Can add/remove users
- Can assign or modify roles
- Can change project-level settings
- Can create, edit, publish, and manage all content
-
Author: Can create and edit recordings and modify content across the entire project.
- Can create and edit recordings
- Can work on all project content
- Cannot delete or archive the project
- Cannot manage users or roles
Roles determine what a user can or cannot do inside the project.
3. Last Activity
Shows the most recent action performed by a user in this project, such as opening a file, editing content, or recording. If a user has just been added, this may show "Never" until they interact with the project.
4. Permissions
Lists the specific actions the user is allowed to perform. This varies by role and may include:
-
Edit content
-
Manage users
-
Change project settings
-
Publish or update files
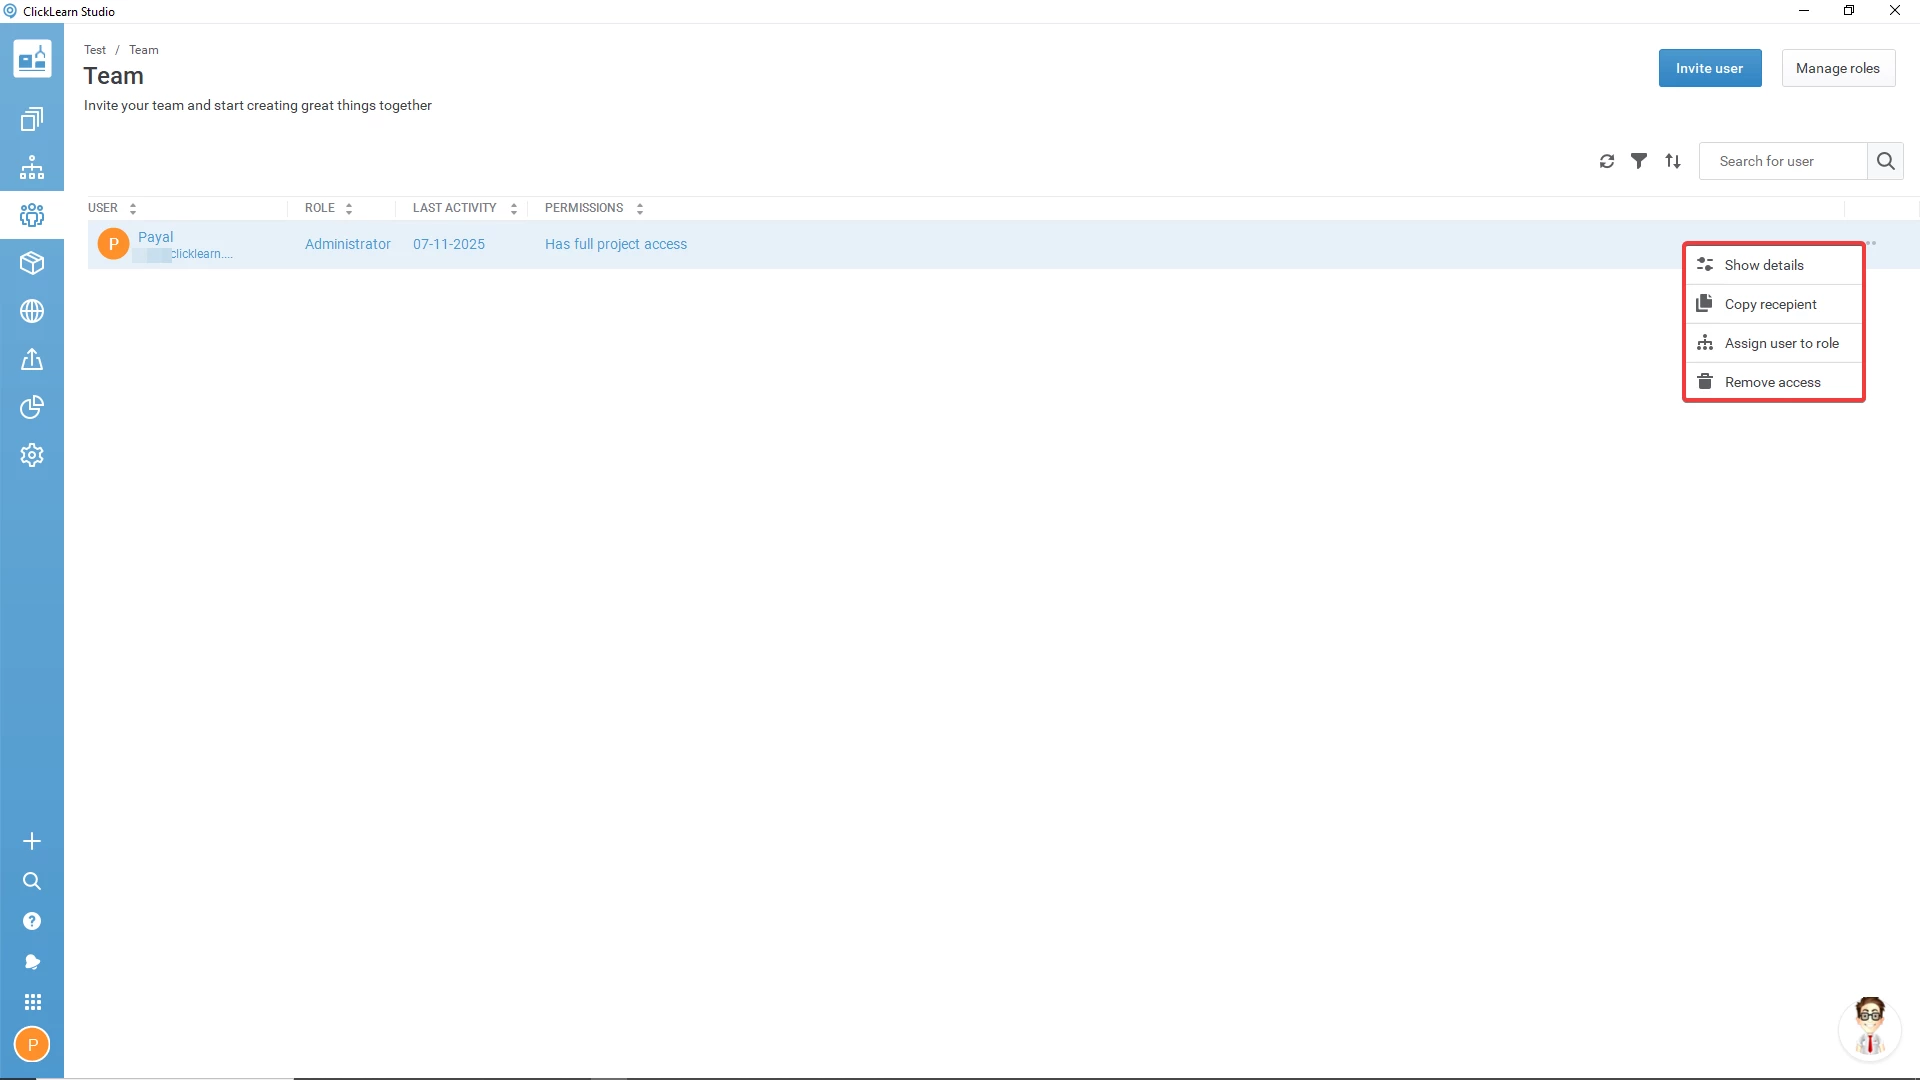
More in Team
The More (⋮) menu provides additional management tools for each user. Click the three-dot menu in the user's Action column.
Options in the More Menu:
-
Show Details
Displays detailed information such as:
-
Role
-
Permissions
-
Last activity
-
Phone number
-
Bio
-
Additional metadata
Also includes a Latest Activity label that highlights the user's most recent interaction.
-
Copy Recipient
Copies the user's email address to your clipboard. A confirmation appears at the bottom-left: "The emails of the recipient(s) have been copied to the clipboard."
-
Assign User to Role
Allows you to change a user's role. When selected, a pop-up appears where you can choose to assign them as:
-
Administrator
-
Author
-
Remove Access
Revokes the user's access to the current project. Administrators typically perform this to maintain project security.
Other Elements in the Team
Refresh
Reloads the list to show the latest user activity and updates.
Filter
Helps you narrow down users based on:
-
Column (Role, Activity, Name, etc.)
-
Selected criteria
Useful when managing large or multi-author teams.
Sort
Sorts the user list based on different fields such as:
-
Name
-
Role
-
Last activity
Helps you organize the team view based on your needs.
Search
Use the search bar to quickly find a specific user by typing their name.
Example: Onboarding a New Team Member
When a new team member joins your project, they need to be assigned a role before they can begin contributing.
Scenario: A new instructional designer, Maria, joins the project and needs authoring rights.
Steps:
-
Add user to the Team (invite or select from the domain list).
- Go to the More (⋮) menu next to her name and select Assign User to a Role.
- Choose Author from the list.
-
Now the user has authoring permissions instantly.
Why it matters:
Without a role, you cannot create or edit content. Assigning a role ensures she can start working immediately.
Best Practices for Managing Your Team in ClickLearn
1. Assign Roles Based on Responsibility
Only users who require full control should be Administrators.
2. Remove Access for Inactive Members
Ensures project security and maintains a clean team list.
3. Use Sorting and Filtering for Large Teams
Quickly find users based on role, activity, or name.
4. Track Last Activity Regularly
Helps identify active contributors and users who may need assistance.
5. Keep Your Team List Updated
Avoid outdated entries or duplicate users to maintain a smooth workflow.
Conclusion
The Team section in ClickLearn Studio is essential for managing collaboration, access, and roles in your project. With tools for monitoring activity, assigning roles, removing access, and organizing users, administrators and authors can work more efficiently and securely.
As you continue to use ClickLearn, effective team management will lead to smoother workflows, faster collaboration, and improved project control.